
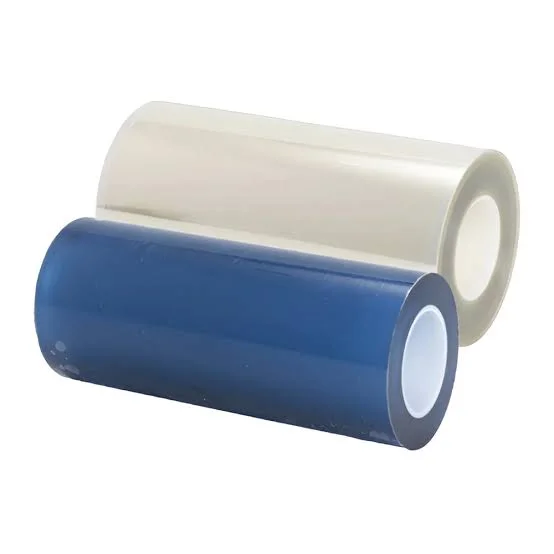
UV DTF crystal labels are applied cold — you do not need a heat press or hot-melt powder. The full sequence is: clean and dry the surface, peel the backing film, position the decal, rub it down firmly with a squeegee or card from the centre outward, then peel the carrier film off slowly at a low angle (DTF Printer). This guide walks through each step, the A film and B film parts involved, and the mistakes that lift fresh edges on cups and hard goods.
What you are actually handling: A film and B film
A UV DTF decal is built from two films. A film is the printable release layer: the design is printed onto its coated side and UV-cured. B film is the laminating carrier pressed over the cured graphic, and it is the layer you eventually peel away. Together they make a ready-to-apply, cold-transfer sticker printed with UV-curable CMYK + white + varnish inks (Winnerjet). For a fuller breakdown of the two roles and the sheet-vs-roll formats, see our A film vs B film buyer's guide.
Step 1 — Clean and dry the surface
Contamination is the single biggest cause of bubbles, silvering and lifting. Oils, dust, moisture and cleaning residue sit between the adhesive and the surface, so they show up as defects on the finished label. Wipe the item clean — rubbing alcohol works best on glass and metal — and let it dry completely before you position anything (DTF Printer).
Step 2 — Peel the backing film
Peel the paper backing away to expose the pressure-sensitive adhesive. Work slowly and avoid touching the exposed adhesive; fingerprints are a form of contamination too. On a paper-based (white thick) A film the paper layer is the backing, while a clear-based (double clear) A film uses a clear carrier — the peel feel is the same, but confirm which base you bought so you do not peel the wrong layer.
Step 3 — Position the decal
Set the decal on the clean surface before you apply pressure. On a flat item, align it and press one edge down first. On a curved item such as a tumbler, anchor one edge and work the decal around the curve so air does not get trapped in the middle.
Step 4 — Rub it down firmly
Use a squeegee, a plastic card or a credit card and press from the centre outward in firm, even strokes. This pushes trapped air to the edges and sets the adhesive against the surface. Do not skip the edges — a label that is only bonded in the centre will lift later.
Step 5 — Peel the carrier film low and slow
Peel the top carrier away at a low angle and low speed. A fast or steep peel is the most common way to lift a fresh edge; the same low-and-slow rule appears in our crystal label troubleshooting guide.
Application notes by surface
| Surface | Preparation | Application tip |
|---|---|---|
| Glass and ceramic cups | Clean with alcohol, dry fully | Rub centre-out with a squeegee |
| Stainless steel tumblers | Clean and dry | Anchor one edge, work around the curve |
| Acrylic and plastic | Clean, check for residue | Test one item before a batch |
| Painted metal | Ensure paint is fully cured | Even pressure across the whole label |
Curved, low-energy and textured surfaces behave differently from flat glass, so run a single test piece and confirm the bond before committing to a full batch.
Mistakes that lift fresh edges
- Peeling the carrier too fast or at a steep angle.
- Skipping the surface clean, or applying while the surface is still wet.
- Rubbing only the centre and leaving the edges unbonded.
- Touching the exposed adhesive during positioning.
Match the film and ink so the decal transfers cleanly
Application is the last step of a chain that starts with the A film, the UV ink set and the B film. A matched system removes the biggest transfer variables, and a pre-matched A+B kit takes away the pairing guesswork. ChromaBind carries UV DTF AB film as A film (A3 sheets in white thick or double clear base, and 31/43/61 cm rolls in paper or clear base), B film (31 cm × 50 m and 31/44/61 cm × 100 m rolls), and matched A+B kits, plus UV DTF ink in CMYK, white and varnish. For the ink side, see UV DTF film and ink pairing and the UV DTF ink buyer's guide.
If you are setting up a new crystal-label line, tell us your substrate (cups, glass, hard goods), the printer width and whether you want sheets, rolls or a starter A+B kit, and request a quote. We confirm the exact format, packing reference and HS reference (3920620000 as a quote reference; final classification remains the importer's or broker's responsibility) for the selected SKU.
References
- DTF Printer, "How to Apply UV DTF Stickers & Wraps" — https://dtfprinter.com/how-to-apply-uv-dtf-transfers
- Winnerjet, "How to Make & Apply UV DTF Stickers: Complete Step-by-Step Guide" — https://www.winnerjet.com/how-to-make-uv-dtf-decals/