
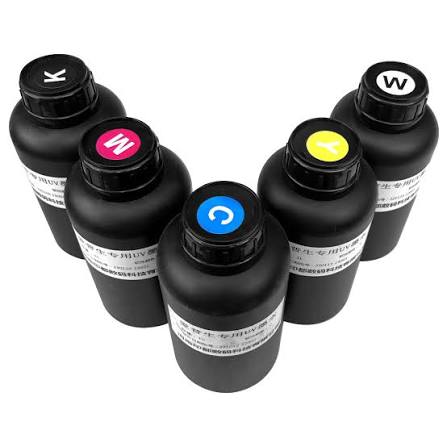
White ink is the layer that makes colour visible on dark garments. When a buyer says "the print looks dull" or "it is not white enough", they are almost always describing white ink opacity and coverage. Opacity is how completely the white layer blocks the fabric from showing through; coverage is how evenly it does so across the print area. Both are testable in a single sample run, and both matter more than the word "high-opacity" on a spec sheet.
This guide is for production shops and distributors comparing DTF ink suppliers or checking an incoming batch. It shows what to look for on a test print, why the white layer behaves the way it does, and which supplier specifications actually let you predict quality before a bulk order.
What White Ink Does and Why Opacity Matters First
In a DTF print, white ink is printed as the underbase beneath CMYK. On a dark shirt, the white layer sits between the fabric and the colour, so the CMYK inks have a light, opaque background instead of the shirt colour. If the white layer is too thin or too transparent, the fabric colour bleeds through and the whole design reads grey, blue or washed out, even when the CMYK colours are correct (INKBANK, 2026).
This is why white ink is the most demanding consumable in the workflow. You can tolerate a small drift in a CMYK shade, but weak white coverage changes every print on every dark garment.
Opacity is not a single number printed on the bottle. It is the result of how much pigment the ink carries, how well that pigment is dispersed, how the printer lays down the white layer, and how the film and powder release it during transfer. That is why an evaluation has to be done on a finished transfer, not on a swatch of wet ink.
How to Read a White Ink Test Print
The most reliable check is a controlled sample using your own printer, film and powder. Print a small test design with three zones:
- A solid white block - checks pure opacity with no colour on top.
- A white block under full CMYK - checks whether colours stay vibrant on the white base.
- Thin white text and hairlines - checks edge definition and whether fine details stay clean.
Transfer the design onto dark cotton with your normal heat-press settings, then inspect under good light. Use this table as a checklist:
| What you see on dark fabric | What it usually means | What to check next |
|---|---|---|
| White block looks grey, blue or transparent | White layer too thin or underloaded | Compare with a known-good batch; increase the white underbase and retest |
| Colour prints look muted even though white looks fine | White-to-colour timing or powder cure issue | Check film release and curing, then isolate ink versus process |
| Pinholing or speckled white | Poor dispersion or contamination | Ask for filtration and particle-size data |
| Sharp edges, clean white, vibrant colours | White coverage and transfer are consistent | Keep this batch as your reference print |
One caution: do not judge opacity from a phone photo of a wet print. A wet white layer always looks more opaque than it will after drying and transfer. Judge only the finished transfer on the actual fabric.
The One Physical Tradeoff Behind Every High-Opacity Claim
White ink gets its opacity from a high loading of titanium dioxide (TiO2), typically around 10-20% by weight. Those pigment particles are denser than the carrier fluid, so they begin to settle as soon as the ink stops moving (Superinks, 2025).
That creates the tradeoff buyers should understand. Higher TiO2 loading raises opacity, but it also makes the ink settle faster, which raises the risk of clogging, banding and batch-to-batch inconsistency if the ink is not kept in circulation. A supplier who simply promises "maximum opacity" without also specifying viscosity, particle size and a filtration pass is not giving you enough to manage that tradeoff on your line.
This is why the words "precipitate-free" or "no-sediment" are misleading. Sedimentation cannot be fully eliminated in a low-viscosity inkjet fluid carrying TiO2; it can only be managed with agitation, ink circulation and stock rotation (Superinks, 2025).
The Specifications to Request Before Committing
Rather than asking a supplier whether their white ink is "good", ask for the data points that predict behaviour on your line:
| Specification | Why it matters for opacity and coverage |
|---|---|
| Viscosity (cP at a stated temperature) | Affects jetting, drop placement and how evenly the white layer is laid |
| TiO2 loading / pigment concentration | Higher loading drives opacity but also speeds sedimentation |
| Particle size distribution (D50, D90) | Determines dispersion stability, opacity and filter or clog risk |
| Filtration pass record | Confirms the batch was filtered to the stated mesh before filling |
| Batch / lot number and production date | Ties a delivered carton to its QC record and remaining shelf life |
| Printer compatibility statement | Confirms the formulation was made for your printhead family |
For the transfer to hold up in production, also confirm the ink has been tested with your film and powder combination, not only on the supplier's reference materials. If any of these data points is unavailable, treat it as an open item to resolve during sampling rather than a reason to skip the question.
You should also confirm documentation for the specific SKU and destination before shipping. MSDS/SDS, transport appraisal and printer compatibility documents are checked per product batch and shipment, and the exact scope is shared with the quotation. For more on liquid consumables and shipping documents, see our guide on importing DTF inks and cleaning liquids.
Run a Sample-Validation Route Before the Bulk Order
The fastest way to avoid a costly mistake is a sample from the exact batch that would be dispatched, run through your real printer, film and powder. Compare the sample against a reference print you have already approved, and keep that reference labelled with the batch number.
- Test the white ink on the darkest fabric you actually sell, not a light test shirt.
- Print at your normal production speed and temperature; do not run a special "sample setting".
- If you are switching suppliers, finish the old batch and flush the ink system before introducing the new one.
- Record the batch number on the test print so the approved sample maps to a specific delivery.
For a broader evaluation framework across film, powder and ink, see our DTF consumables testing checklist.
ChromaBind supplies DTF white and CMYK ink in 20KG cartons, with carton dimensions, gross weight and CBM recorded per colour. See the DTF ink product page for current packing references. Because ink quality is only half of the equation, we recommend checking the white underbase against your film and powder together in the same sample run.
What to Ask Before You Commit
Before placing a bulk order, get clear answers to these five questions:
- Can you provide batch-specific viscosity and particle-size data, not just a marketing claim of high opacity?
- Which printhead family was this ink formulated and tested for?
- What filtration pass did this batch go through before filling?
- Can you send a sample from the exact batch that will be dispatched?
- Which documentation (MSDS/SDS, transport appraisal, compatibility) will accompany this shipment, and what is its confirmed scope for my destination?
A supplier that answers with data gives you a repeatable quality baseline. A supplier that answers with superlatives gives you a risk you will discover on the heat press.
Next steps. Start with one dark-fabric test print using your current printer, film and powder, and keep it as your reference. When you are ready to compare ink SKUs, batch data and a sample route for your line, request a quote and we will confirm the details for your printhead, film and powder setup.